前言
在日常运维工作中,你是否也遇到过这样的场景:公司业务快速增长,服务器从几台迅速扩展到上百台;Prometheus监控体系已搭建完成,却因为Node Exporter没装、版本不一、配置混乱,导致大量主机指标缺失,告警形同虚设?
手动SSH逐台安装?不仅效率低下,还容易出错;写脚本批量执行?又面临环境差异、权限控制、回滚困难等问题。
别急!Ansible正是为这类场景而生。
它无需客户端、基于SSH、幂等可靠,只需一个Playbook,3 分钟内即可在全网Linux主机上统一部署、启动并配置Node Exporter,无缝对接Prometheus,让每一台机器的CPU、内存、磁盘、网络等核心指标尽在掌握。
本文将手把手教你编写一个轻量、可复用的Ansible自动化部署方案,从此告别重复劳动,真正实现“监控先行,稳定无忧”。
如果你还想监控家里的电脑,但设备在内网无法直连?别急,文末附赠 cpolar 内网穿透方案,让 Ansible 照样远程部署!

1.在你的虚拟机上安装ansiable
1.1 什么是Ansible?
Ansible是一个开源的 自动化运维工具,由Red Hat赞助开发,用于实现:
- 配置管理(Configuration Management)
- 应用部署(Application Deployment)
- 任务自动化(Task Automation)
- IT编排(Orchestration)
它最大的特点是:简单、无代理、基于SSH、使用YAML语法。
1.2 Ansible的核心作用
- 批量执行命令
无需逐台登录服务器,一条命令可在成百上千台机器上同时运行:
- 统一配置管理
确保所有服务器的配置一致,比如:
- 安装指定版本的软件(如 Node Exporter、Nginx)
- 同步配置文件(如 /etc/hosts、prometheus.yml)
- 创建用户、设置权限、管理服务状态
- 自动化部署应用
通过 Playbook(YAML 文件)定义部署流程,一键完成复杂应用上线:
- 幂等性(Idempotency)
重复执行同一个 Playbook,结果始终一致——没装的会装,已装的不会重复操作,安全可靠。
- 无需安装客户端(Agentless)
Ansible通过SSH 与目标主机通信,只需控制机安装Ansible,被控机只要有Python 和SSH即可。
- 支持云和容器编排
可管理AWS、Azure、阿里云等云资源,也能操作Docker、Kubernetes。
1.3 安装ansiale
我这里是ubuntu系统,如果想使用centos可以看这边文章:别再手动操作了!我用Ansible+cpolar给飞牛OS装了个“遥控器” – cpolar 极点云官网
登录到 Ubuntu系统,并在APT命令下运行以应用更新:
sudo apt update
sudo apt upgrade -y
安装最新版本的Ansible:
apt install -y ansible
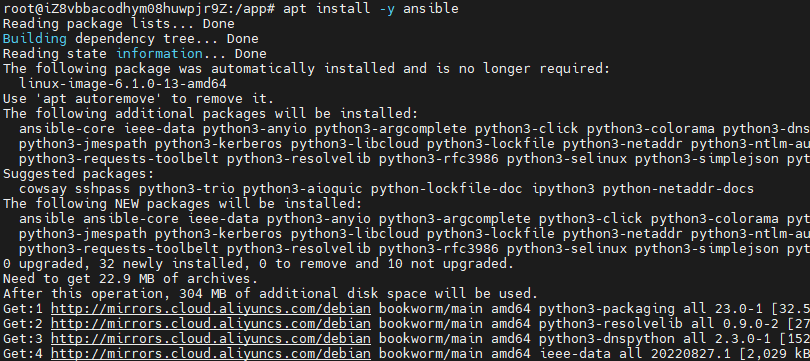
安装完成后,验证ansiable版本:
ansible --version

我们查看一下,有没有启动文件:
ls /etc/ansible
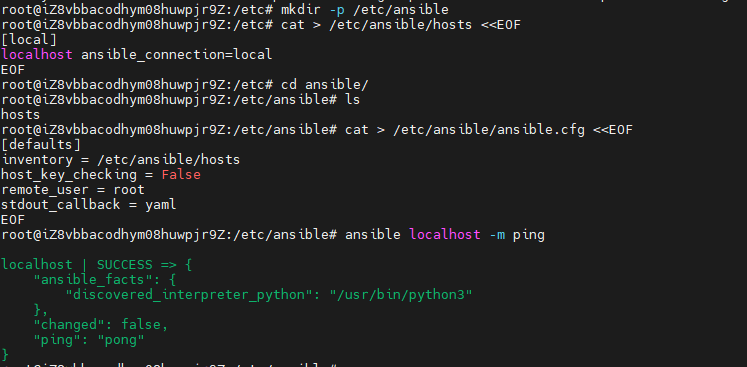
我发现我这里没有,那我们手动配一下,创建ansiable文件:
mkdir -p /etc/ansible
编写hosts文件:
cat > /etc/ansible/hosts <<EOF
[local]
localhost ansible_connection=local
EOF
编写ansiable.cfg文件:
cat > /etc/ansible/ansible.cfg <<EOF
[defaults]
inventory = /etc/ansible/hosts
host_key_checking = False
remote_user = root
stdout_callback = yaml
EOF
验证是否成功:
ansible localhost -m ping
2.配置ansiable文件搞定Node Exporter部署!
确保你在playbook所在目录(假设是 /etc/ansible):
cd /etc/ansible
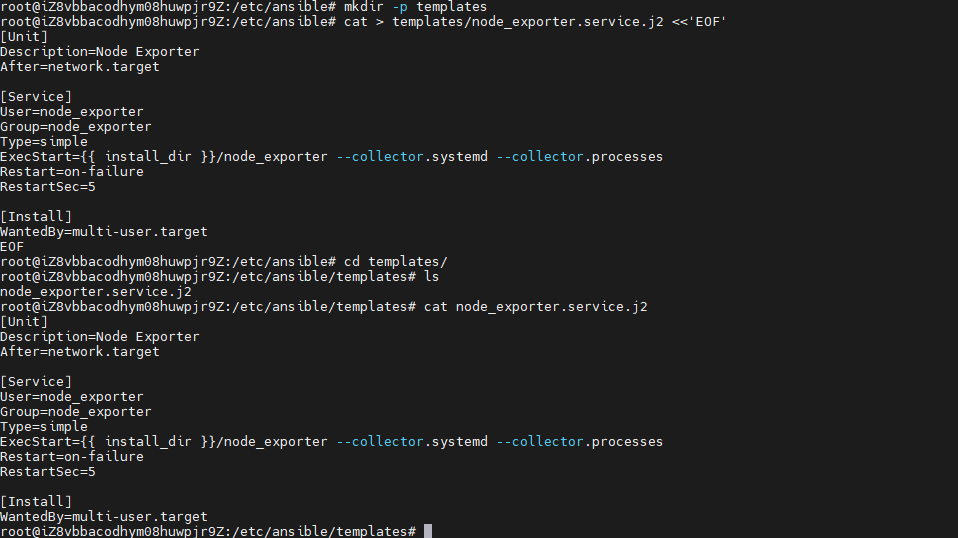
创建templates目录
mkdir -p templates
创建服务模板文件:
cat > templates/node_exporter.service.j2 <<'EOF'
[Unit]
Description=Node Exporter
After=network.target

[Service
User=node_exporter
Group=node_exporter
Type=simple
ExecStart={{ install_dir }}/node_exporter --collector.systemd --collector.processes
Restart=on-failure
RestartSec=5

[Install]
WantedBy=multi-user.target
EOF
首先,我们来过一下安装node_exporter基本步骤:
mkdir /shan
cd /shan
curl -LO https://github.com/prometheus/node_exporter/releases/download/v1.10.2/node_exporter-1.10.2.linux-amd64.tar.gz
tar -zxvf node_exporter-1.10.2.linux-amd64.tar.gz
rm -rf node_exporter-1.10.2.linux-amd64.tar.gz
mv node_exporter-1.10.2.linux-amd64/ node_exporter
sudo vi /etc/systemd/system/node_exporter.service
[Unit]
Description=Node Exporter
Documentation=https://github.com/prometheus/node_exporter
After=network.target

[Service]
User=node_exporter
Group=node_exporter
Type=simple
ExecStart=/shan/node_exporter/node_exporter

[Install]
WantedBy=default.target
useradd --no-create-home --shell /bin/false node_exporter
systemctl start node_exporter
systemctl enable node_exporter
手动操作还好,但是一键部署是不是感觉头都大了?
别急,我这边已经研究好啦!只需要你复制粘贴,就能操作成功!
编辑hosts文件,加入你所要监控的ip和他的用户名及密码:
[test]
ip ansible_ssh_user=用户名 ansible_ssh_pass=密码

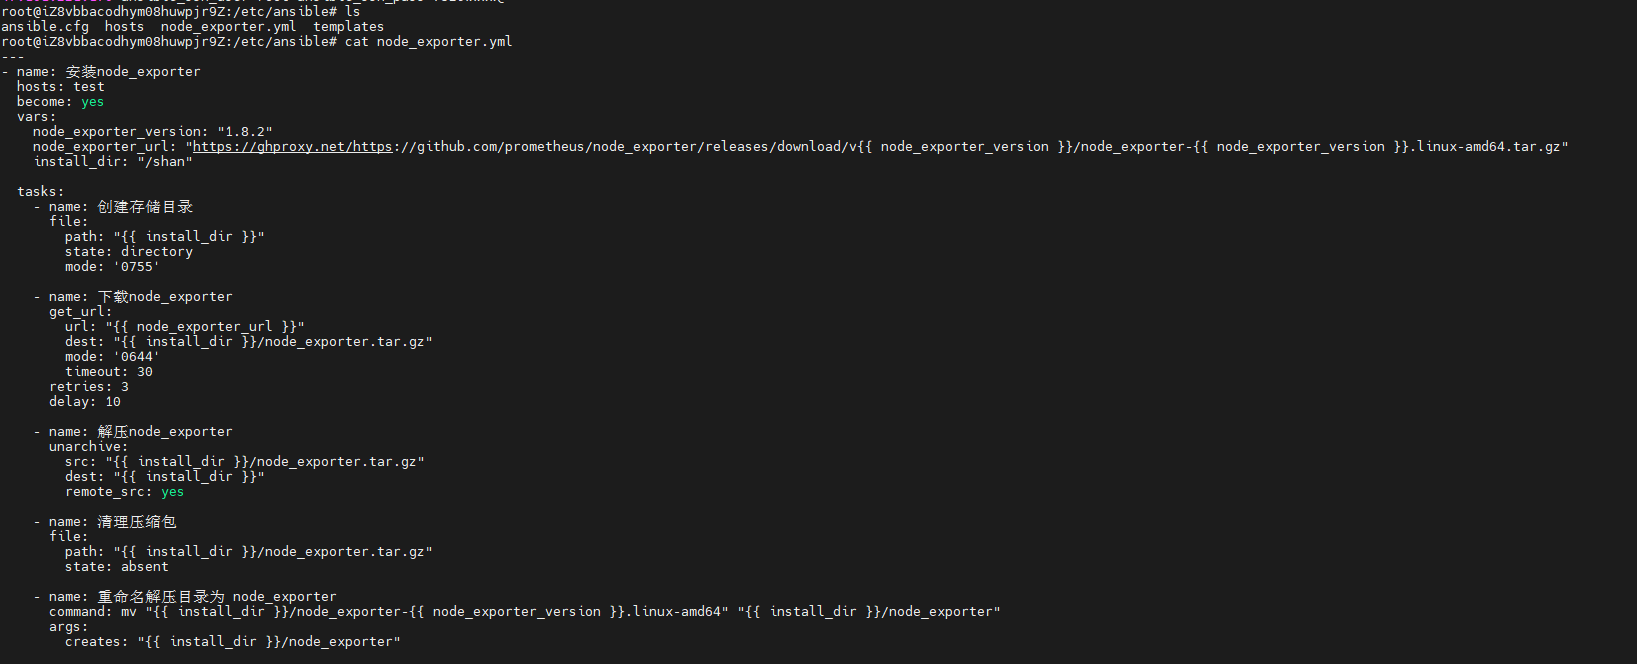
编辑命令yml文件:
---
- name: 安装node_exporter
  hosts: test
  become: yes
  vars:
    node_exporter_version: "1.8.2"
    node_exporter_url: "https://ghproxy.net/https://github.com/prometheus/node_exporter/releases/download/v{{ node_exporter_version }}/node_exporter-{{ node_exporter_version }}.linux-amd64.tar.gz"
    install_dir: "/shan"

  tasks:
    - name: 创建存储目录
      file:
        path: "{{ install_dir }}"
        state: directory
        mode: '0755'

    - name: 下载node_exporter
      get_url:
        url: "{{ node_exporter_url }}"
        dest: "{{ install_dir }}/node_exporter.tar.gz"
        mode: '0644'
        timeout: 30
      retries: 3
      delay: 10

    - name: 解压node_exporter
      unarchive:
        src: "{{ install_dir }}/node_exporter.tar.gz"
        dest: "{{ install_dir }}"
        remote_src: yes

    - name: 清理压缩包
      file:
        path: "{{ install_dir }}/node_exporter.tar.gz"
        state: absent

    - name: 重命名解压目录为 node_exporter
      command: mv "{{ install_dir }}/node_exporter-{{ node_exporter_version }}.linux-amd64" "{{ install_dir }}/node_exporter"
      args:
        creates: "{{ install_dir }}/node_exporter"

    - name: 删除旧目录
      file:
        path: "{{ install_dir }}/node_exporter-{{ node_exporter_version }}.linux-amd64"
        state: absent

    - name: 创建专用用户
      user:
        name: node_exporter
        system: yes
        shell: /sbin/nologin
        createhome: no

    - name: 配置systemd服务
      template:
        src: node_exporter.service.j2
        dest: /etc/systemd/system/node_exporter.service
        owner: root
        group: root
        mode: '0644'

    - name: 重载systemd配置
      systemd:
        daemon_reload: yes

    - name: 启动并启用node_exporter服务
      systemd:
        name: node_exporter
        enabled: yes
        state: started
然后使用ansible-playbook执行就好啦:
ansible-playbook node_exporter.yml
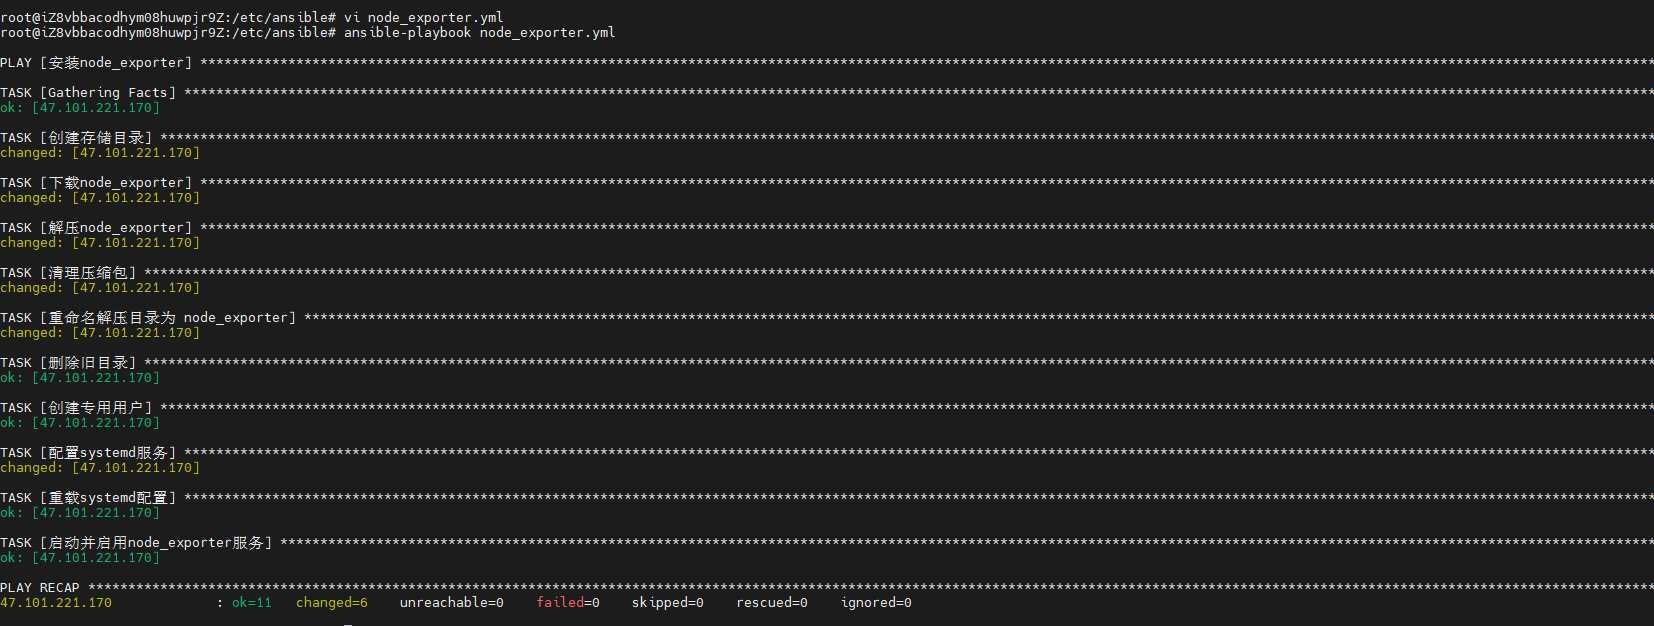
切换到被安装的IP下,验证是否安装成功:
systemctl status node_exporter
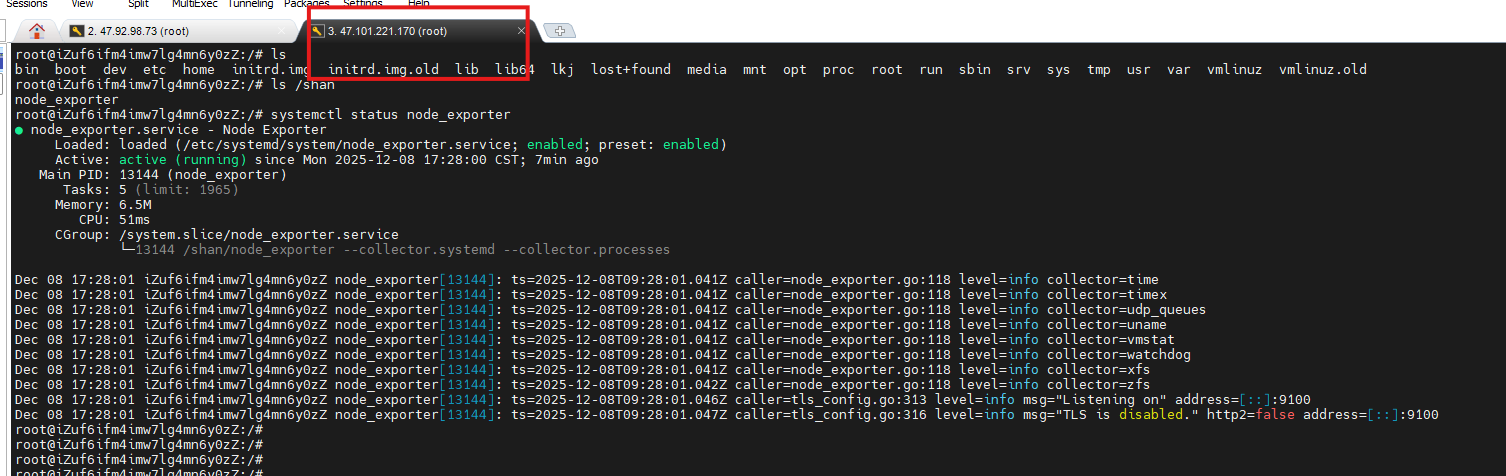
至此我们通过ansible配置node_exporter算是成功啦!
我们后续可以在hosts添加上百台主机统一安装。
那么问题来了,目前我们只是在统一局域网下可以部署,那么我们想部署家里电脑,想监控家里电脑的指标怎么办呢?别急,cpolar来拯救你!
3.安装cpolar实现随时随地开发
cpolar 可以将你本地电脑中的服务(如 SSH、Web、数据库)映射到公网。即使你在家里或外出时,也可以通过公网地址连接回本地运行的开发环境。
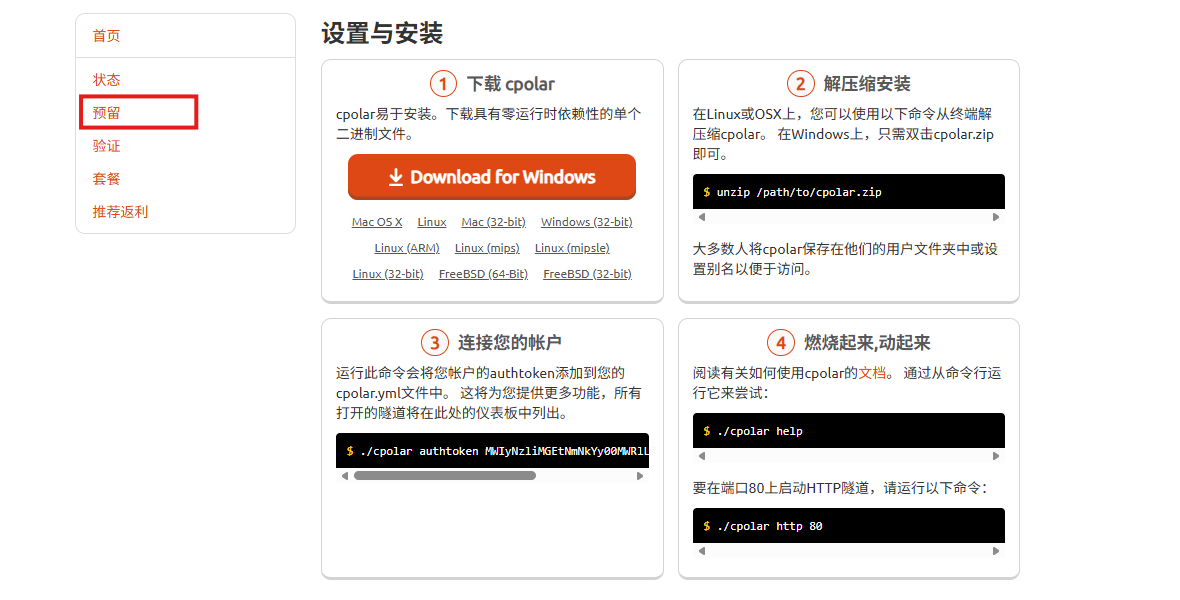
❤️以下是安装cpolar步骤:
使用一键脚本安装命令:
sudo curl https://get.cpolar.sh | sh
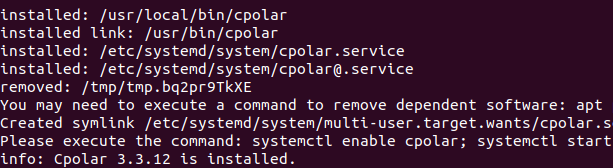
安装完成后,执行下方命令查看cpolar服务状态:(如图所示即为正常启动)
sudo systemctl status cpolar
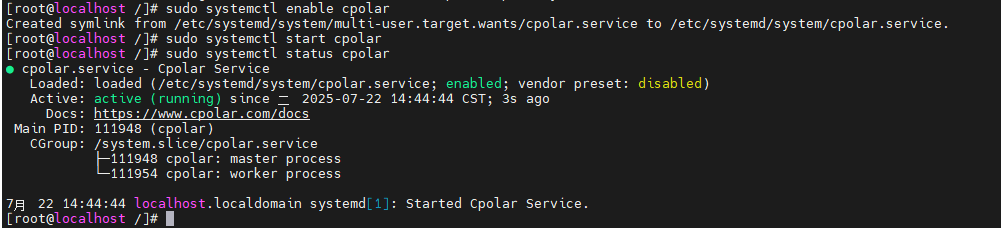
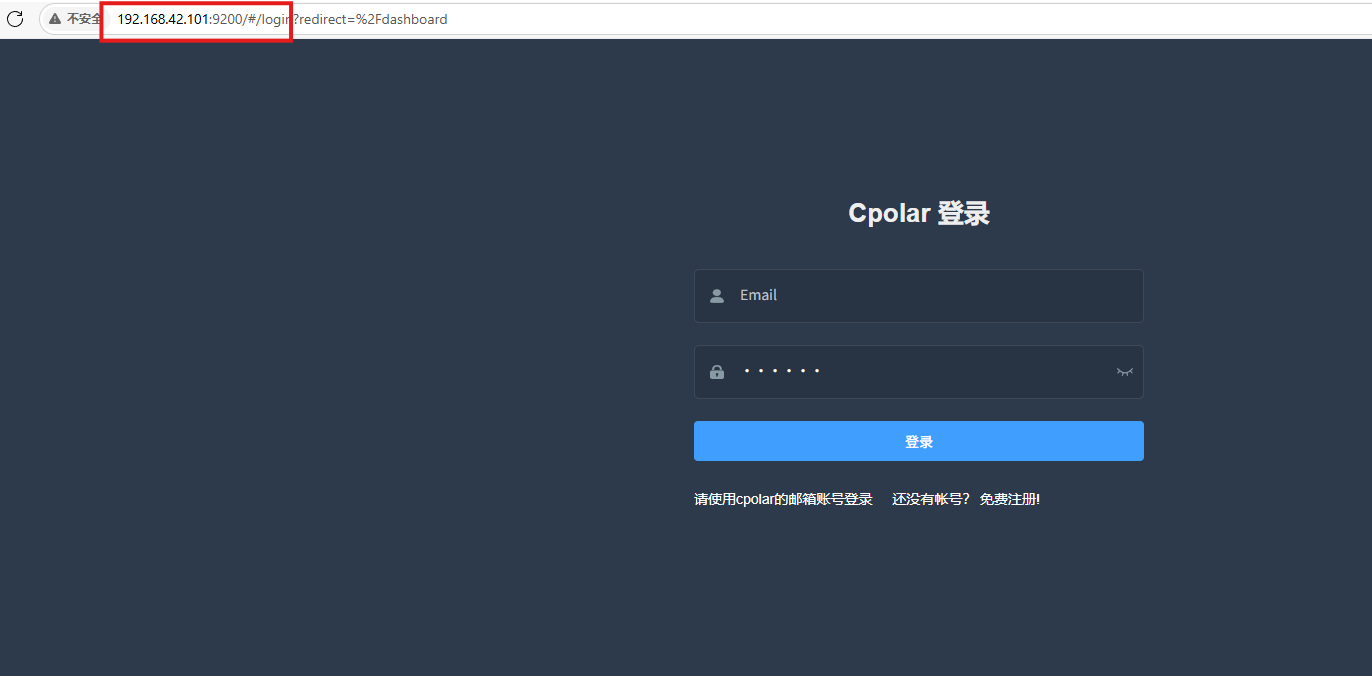
Cpolar安装和成功启动服务后,在浏览器上输入虚拟机主机IP加9200端口即:【http://ip:9200】访问Cpolar管理界面,使用Cpolar官网注册的账号登录,登录后即可看到cpolar web 配置界面,接下来在web 界面配置即可:
打开浏览器访问本地9200端口,使用cpolar账户密码登录即可,登录后即可对隧道进行管理。
4.配置公网地址
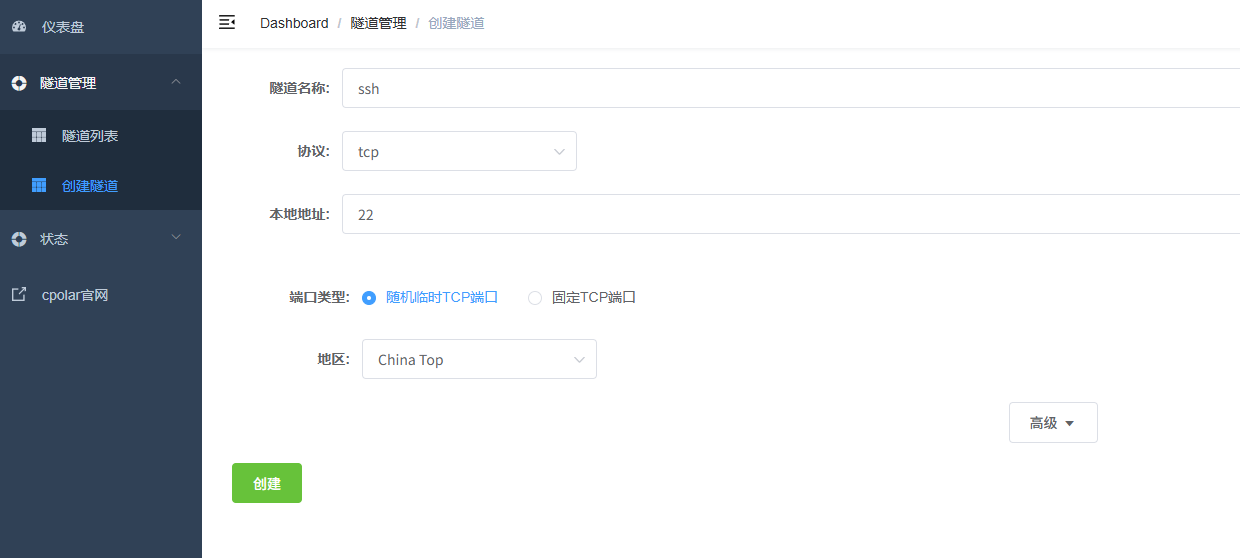
通过配置,你可以在本地 WSL 或 Linux 系统上运行 SSH 服务,并通过 Cpolar 将其映射到公网,从而实现从任意设备远程连接开发环境的目的。
- 隧道名称:可自定义,本例使用了:ssh,注意不要与已有的隧道名称重复
- 协议:tcp
- 本地地址:22
- 端口类型:随机临时TCP端口
- 地区:China Top
创建成功后,打开左侧在线隧道列表,可以看到刚刚通过创建隧道生成了公网地址,接下来就可以在其他电脑或者移动端设备(异地)上,使用任意一个地址在终端中访问即可。
- tcp 表示使用的协议类型
-
2.tcp.cpolar.top是 Cpolar 提供的域名
-
16198是随机分配的公网端口号
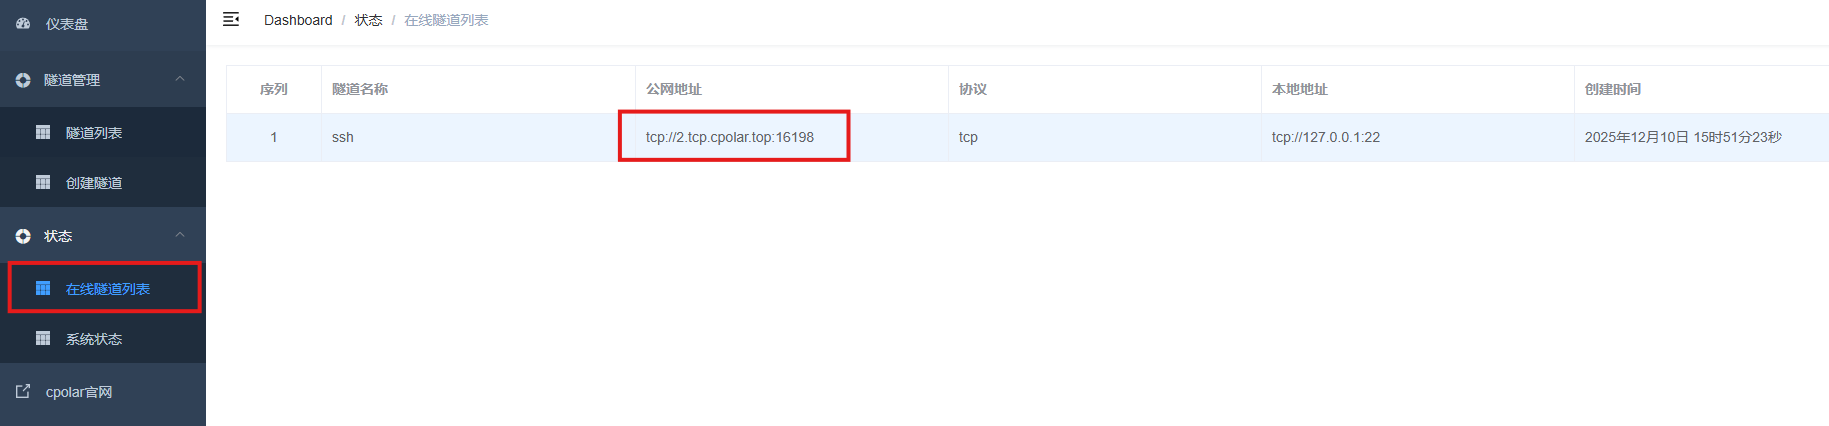
通过 Cpolar 提供的公网地址和端口,就可以使用ansible进行远程部署啦!
接下来我们操作一下。
修改hosts配置文件:
[dbservers]
2.tcp.cpolar.top ansible_user=root ansible_port=16198 ansible_password=***

接下来我们执行配置node_exporter文件:
ansible-playbook node_exporter.yml
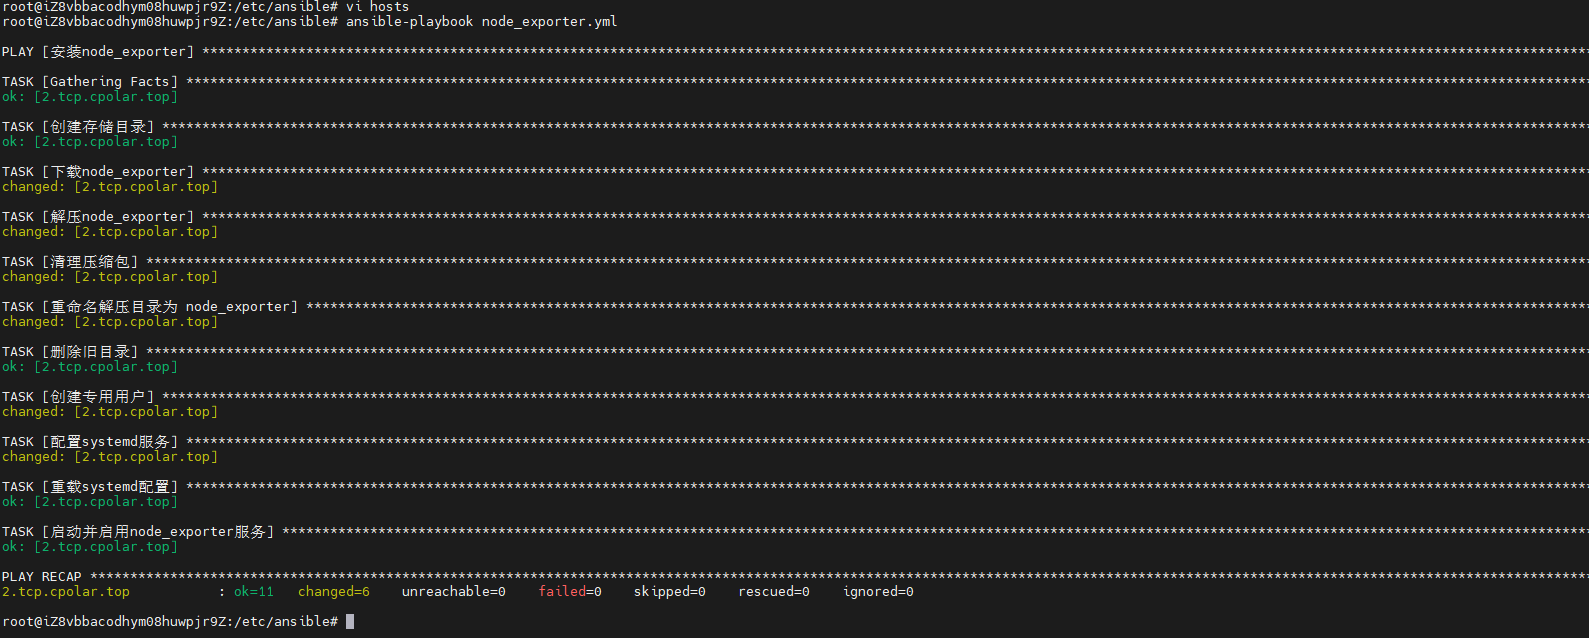
执行成功,我们去对应主机查看node_exporter服务是否开启成功:
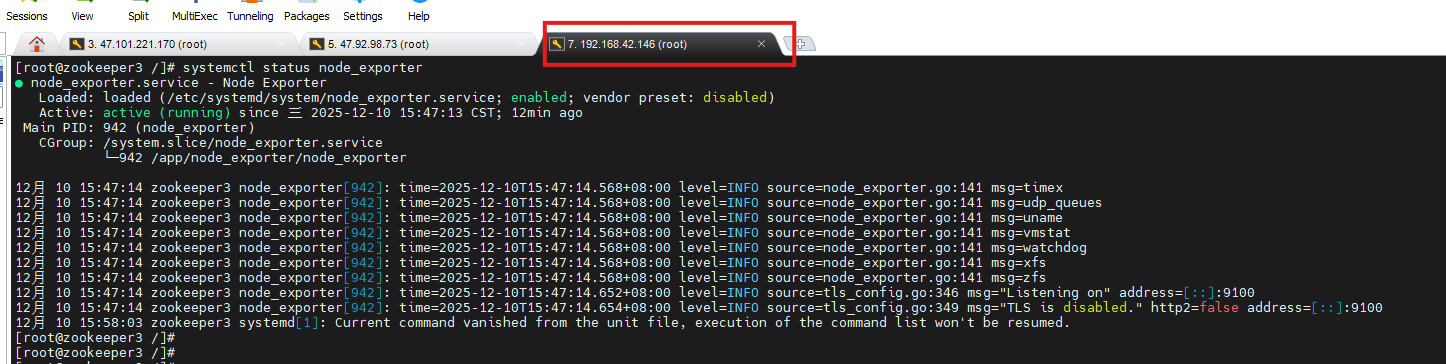
我们可以看见,目标主机已经成功安装~
5.保留固定TCP公网地址
使用cpolar为其配置TCP地址,该地址为固定地址,不会随机变化。
选择区域和描述:有一个下拉菜单,当前选择的是“China VIP”。
右侧输入框,用于填写描述信息。
保留按钮:在右侧有一个橙色的“保留”按钮,点击该按钮可以保留所选的TCP地址。
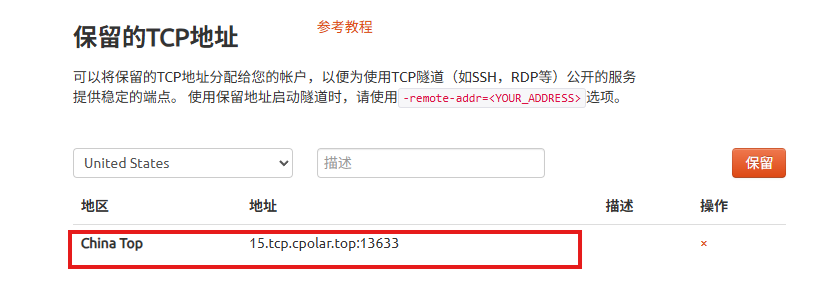
列表中显示了一条已保留的TCP地址记录。
- 地区:显示为“China VIP”。
-
地址:显示为“15.tcp.cpolar.top:13633”。
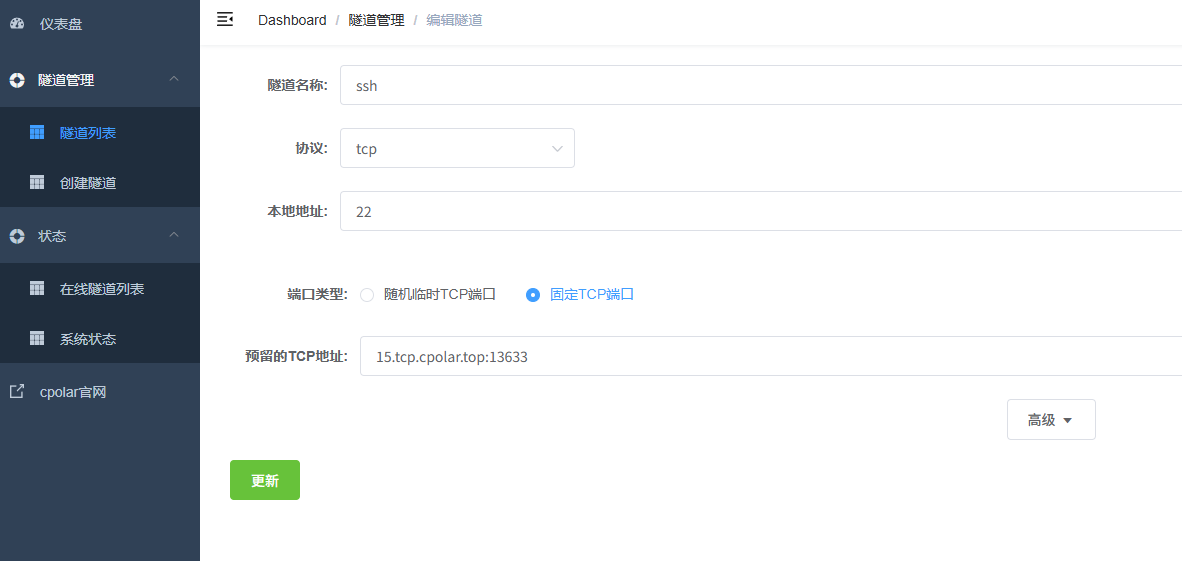
登录cpolar web UI管理界面,点击左侧仪表盘的隧道管理——隧道列表,找到所要配置的隧道ssh,点击右侧的编辑。
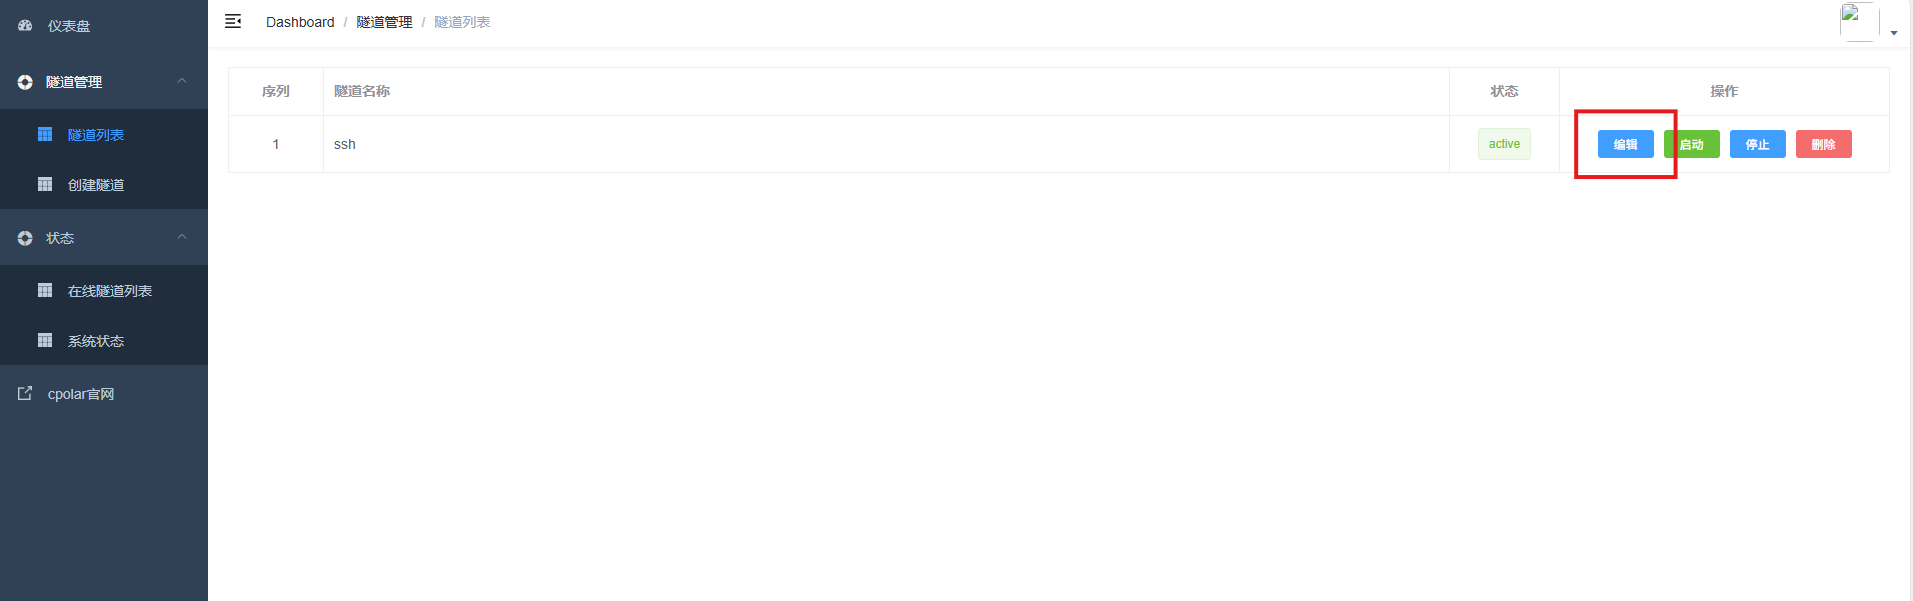
修改隧道信息,将保留成功的TCP端口配置到隧道中。
- 端口类型:选择固定TCP端口
- 预留的TCP地址:填写保留成功的TCP地址
点击更新。
创建完成后,打开在线隧道列表,此时可以看到随机的公网地址已经发生变化,地址名称也变成了保留和固定的TCP地址。
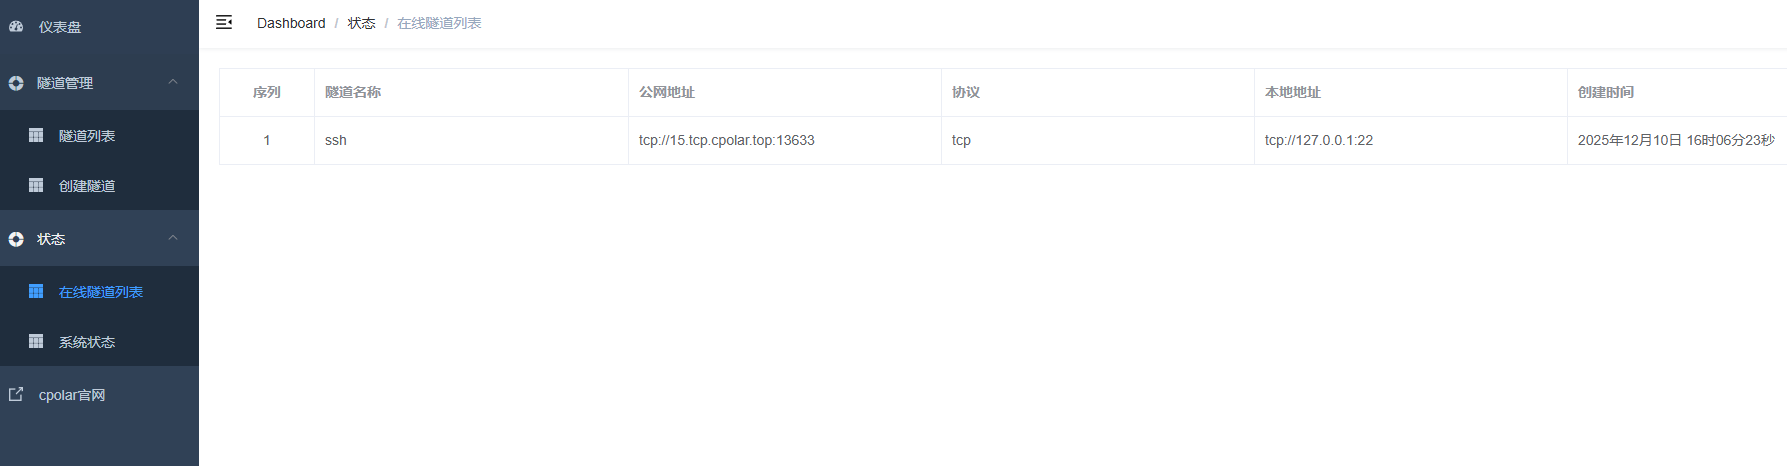
这样我们的ansible操作就没有任何的阻碍啦!
总结
总结通过Ansible编写简单的Playbook,我们实现了Node Exporter的批量、快速、统一部署,三分钟即可为上百台机器接入Prometheus监控体系。自动化代替手动操作,高效又可靠——监控,本该如此简单!
感谢您对本篇文章的喜爱,有任何问题欢迎留言交流。cpolar官网-安全的内网穿透工具 | 无需公网ip | 远程访问 | 搭建网站